To Create A Subdomain In controlpanel:
The ease of setting up subdomains is one of the most powerful features of controlpanel.
With just a couple of clicks you can have a subdomain activated, with a fresh copy of WordPress, and even a valid SSL certificate.
Recently we’ve had some questions on how to modify these, including deleting them, so I figured I’d make a little guide to help everyone out.
Check DNS Records
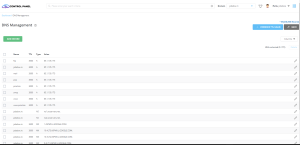
Before getting started, it’s important to perform a DNS Check using our free DNS Shricloud tool.
This allows you to make sure everything is setup correctly, so when you go to create the subdomain it’ll provision as expected.
As you can see in the above screenshot we’re using Name Hero’s name servers (ns29.namehero.net and ns30.namehero.net) so controlpanel will setup everything automatically.
If I’m checking a site hosted by a reseller, it’s important to see the Reseller’s name servers. If you’re using a third-party DNS provider, such as Cloudflare, you’ll need to follow their directions to properly add the corresponding records.
You should see no red on the report before getting started. (Important: if using Cloudflare’s names servers you may see a false-positive test result, but always best to check with their support team to make sure).
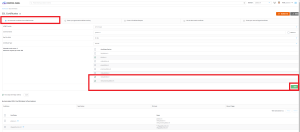
How To Create A Subdomain
Once you’re certain your DNS records are all set, you need to follow these simple steps to add the subdomain:
-
Login to controlPanel
-
Navigate to the Domains icon
-
Click Create A New Domain
-
Create the Subdomain as the screenshot above shows
The document root is the folder where all the files will live. I recommend keeping this default as it will place all the files just above your public_html directory of your main website.
Once you click Create it may take up to 24 hours for the DNS records to fully propagate. Most of the time it only takes a few hours in the United States, but if you don’t see it active right away, that’s why.
You can also see this article: How To Speed Up DNS Propagation to try and speed up this process.
How To Install WordPress
If you’re wanting to install WordPress on the subdomain, the easiest way is to navigate WordPress under the Softaculous apps installer in controlpanel:
-
Login to controlpanel
-
Click on WordPress under Softaculous Apps Installer
-
Click Install Now
-
Under “Choose Installation URL” select the subdomain you just created
-
Continue installing WordPress per the directions provided on the screen
How To Setup SSL On Your Subdomain
If you just setup your subdomain it’s possible the SSL certificate hasn’t automatically installed. For this to happen, the DNS records must be propagated so the Let’s Encrypt module can verify domain identification.
If you’d like to manually try to run it, you can follow these steps:
-
Login to controlpanel
-
Click SSL/TLS Status
-
Check the box next to the red beside the subdomain (as noted in the screenshot above)
-
Click Run AutoSSL
This will attempt to force run the AutoSSL module. It takes a few minutes to run, so just set and let it do its thing. If it fails, it’s likely you need to wait another hour or two for the DNS to propagate. This process should be automated if waiting 24 hours or more.
Still if you are facing problem to create a subdomain contact us .
For your reference we have provided more information about subdomains:
Subdomains are essentially subdivisions of your main domain, allowing you to create separate web addresses (URLs) under your primary domain. In a control panel, managing subdomains is straightforward and provides users with a range of options and controls. Here’s more information on managing subdomains in a control panel:
1. Creating Subdomains:
In a control panel, you can easily create subdomains through the “Subdomains” or “Subdomains Manager” section. Simply enter the desired subdomain prefix, and the control panel will automatically populate the full subdomain URL and directory path. For example, if your primary domain is “example.com” and you create a subdomain “blog,” the full URL would be “blog.example.com,” and the control panel will create a corresponding directory for the subdomain where you can upload files specific to that subdomain.
2. Managing Subdomains:
Once created, you have various management options for your subdomains in the control panel. You can view a list of all existing subdomains, edit their settings, including the document root directory, or delete them if no longer needed. This flexibility allows you to tailor your subdomains to suit your specific needs.
3. Redirects and Forwarding:
In a control panel, you can set up redirects and forwarding for your subdomains. This means you can redirect traffic from a subdomain to another URL, either within your domain or to an external website. This feature is useful for directing users to specific pages or sections of your website or for setting up vanity URLs.
4. Subdomain Statistics:
The control panel provides statistics and analytics for each subdomain, allowing you to track its traffic, bandwidth usage, and other metrics. This data can be valuable for monitoring the performance of your subdomains and making informed decisions about their management and optimization.
5. Subdomain Security:
While managing subdomains, it’s essential to consider security implications. The control panel offers features such as SSL/TLS management, which allows you to secure subdomains with SSL certificates for encrypted connections. Additionally, you can configure access controls and permissions for subdomains to restrict or allow specific users or IP addresses.
6. Email Accounts and Subdomains:
With a control panel, you can also create email accounts associated with your subdomains. This means you can have unique email addresses using your subdomain, such as “[email protected].” Managing email accounts for subdomains allows you to organize and streamline communication for different sections or departments of your website.
7. Subdomain Forwarding:
If you have a subdomain that you want to point to another website or URL, the control panel allows you to set up subdomain forwarding easily. This feature is handy for directing users to external resources or temporary landing pages without creating a separate website or directory.
Overall, a control panel provides comprehensive control and management capabilities for subdomains, empowering website owners to create, customize, and optimize their web presence effectively. Whether you’re setting up a blog, a forum, or a separate section of your website, managing subdomains in a control panel offers flexibility and convenience.